.svg "Full Color (1)")


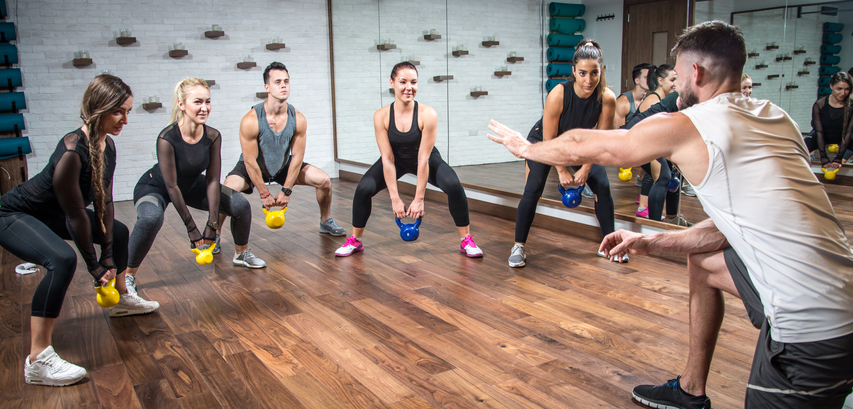
Hosting your online personal training sessions has never been easier now that you can run online classes and one on one appointments side by side. Our new Appointment feature completely streamlines the process of offering and booking online sessions by making availability visible to all personal training clients.
Paired with our Zoom integration, you can now set your availability and manage your schedule while clients use your customer site and TeamUp Member App to book online sessions with you. With a system designed to take away the complexity of managing multiple schedules and clients who want to book at certain times and dates, deliver your services online can now be quick, painless, and enjoyable.
Do you want to start offering your online personal training sessions using your TeamUp personal training software? We'll show you how to use your Zoom account and integration to make that happen.
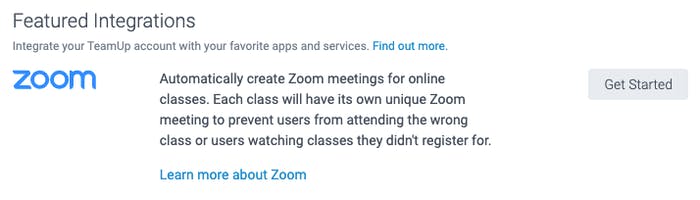
Use TeamUp's Zoom integration to offer online appointments
With the Zoom integration built into your software, you can run your group online classes and now one on one online appointments side by side. To help you quickly learn how to offer online appointments, we're going to take you step by step through our guide on how to use Zoom for personal training sessions. We've also included our top tips for delivering high-quality online PT sessions on Zoom at the end of the guide to set you up for success in both installation and production.
How to offer online appointments with TeamUp's new appointment feature in 4 easy steps
Similar to online classes, online appointments are hosted via TeamUp's Zoom integration. Your clients do not need a Zoom account (free or paid) in order to attend a training session as a participant, but you will need one to host the sessions. If you already run your online classes with TeamUp's Zoom integration, skip down to step 3. If you have not integrated your TeamUp account with Zoom let's start with step 1.
Step 1: Integrating your TeamUp account with Zoom
To start using the Zoom integration in your TeamUp account will need to go to the settings tab in your dashboard and select the integrations options. There you will see Zoom at the top of the list of TeamUp's integrations. To connect to Zoom you will need to press the Connect to Zoom button or create a free Zoom account if you have not already.
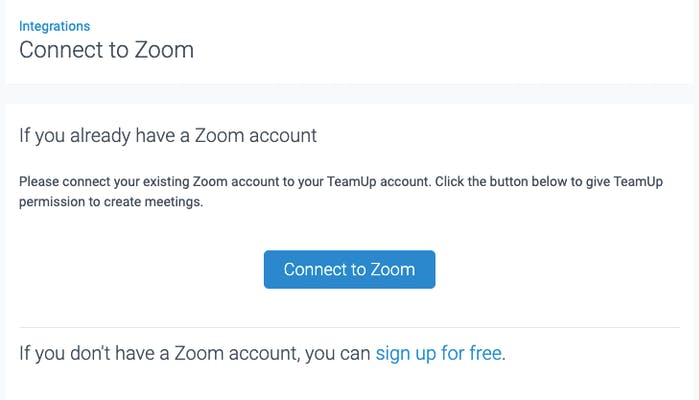
Once Zoom has authorised the connection, Zoom will now show as "integrated" in your integrations settings. To edit or set up any additional controls for your Zoom settings such as recording, host, link, you will need to do so directly in Zoom.
Step 2: Setting up a Zoom venue in TeamUp's personal training software
In your settings, you will also see an option for Venues/Rooms. To use the Zoom integration you will first need to create a new venue for your online classes. There you will create a new venue for Zoom so that when you are scheduling online sessions it will be clear that the session is hosted online vs. in-person. You'll start by adding a venue where it will ask you to write in details for name, description, location, and if this is a physical or an online venue, as well as the Video URL Type and link.

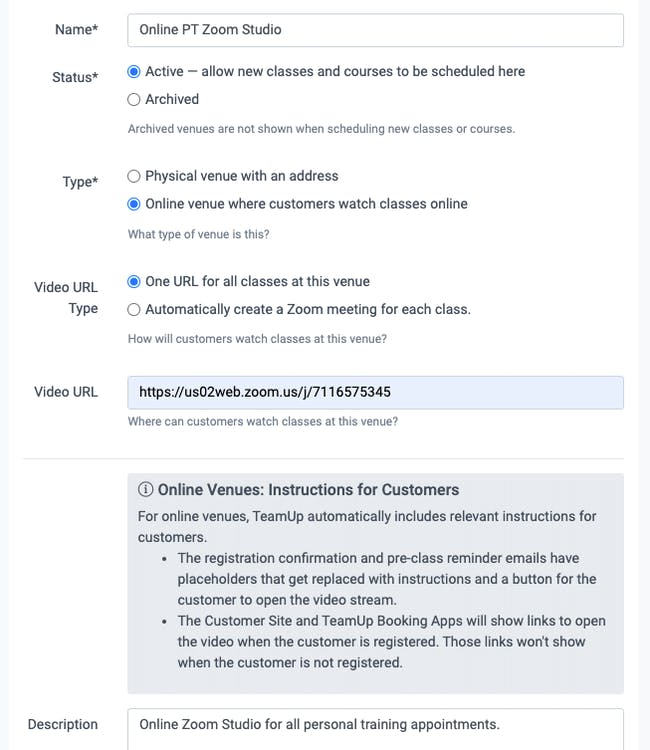
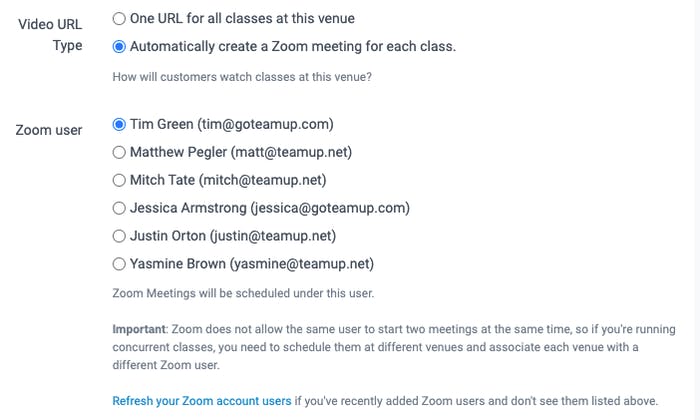
If you would like the same link to be used for all appointments and classes at this venue you can do so, but if you would like each different coach or instructor to have their own personal meeting ID, Zoom links you can create a new venue for each individual user by selecting the option to automatically create a Zoom meeting for each class. For our clients with multiple instructors, classes, and appointments, we suggest this option as the safest so that only clients registered for that appointment or class can join.
As mentioned in the information section of the page, when a client signs up for a class or appointment on Zoom they'll automatically receive a link to the Zoom room to their email (and can also access in the member app) that will be accessible shortly before the class or appointment begins. (Note: unlike your in-person appointments, you will not need to add online rooms as each Zoom appointment will have a new link. So if you do not plan on offering in-person appointments, skip adding a room at this time).
Step 3: Creating online appointments
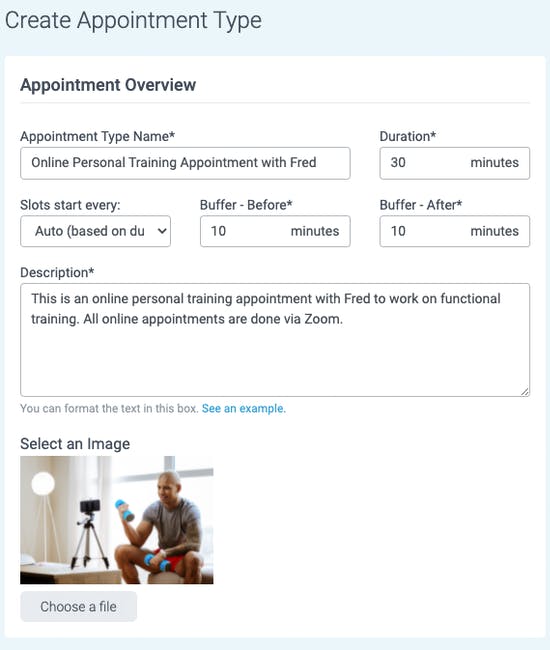
Once your online venue is created you can begin creating your online appointment types. To do you will need to go to the Classes/Appointments tab on the left-hand side of your dashboard and select Appointment Types. There you will see the option to Create a New appointment.

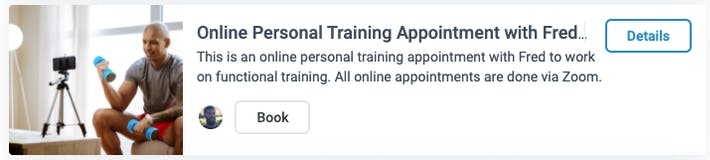
You'll begin by adding details such as the appointment type name, duration, time slots, and description. To make it even more clear that this is an online appointment you can include that in the name and description, and even add a photo for emphasis.
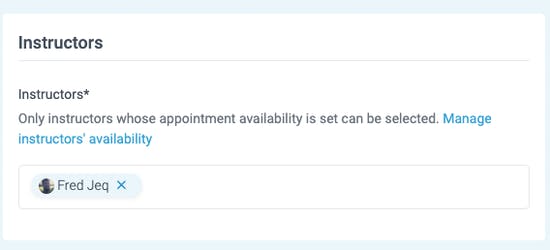
Instructors
Next, you will need to assign an instructor or multiple instructors to the appointment. If you have not already added availability to your instructors you will need to do so by selecting the "Manage instructors' availability" button.
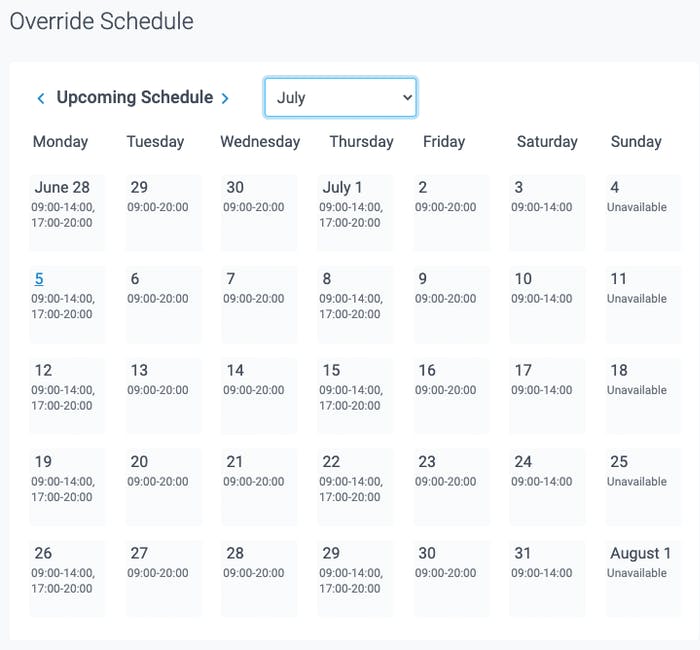
You can view their regular schedule and edit or set new time slots for regular availability. If you would like to make any temporary changes you can do so using the override schedule.
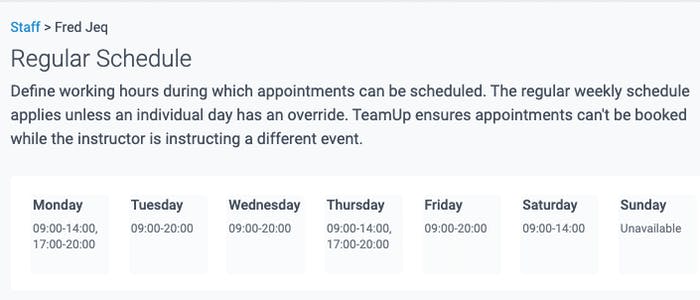
Once the instructors' availability is set you can add them to the appointment.

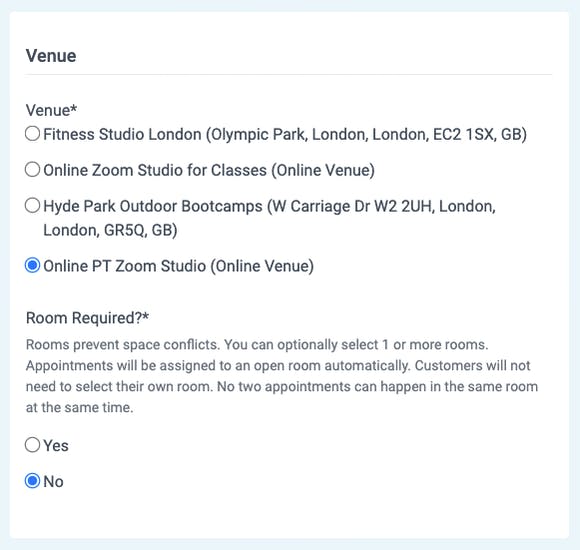
Venues
After you add the instructor availability you will select your online venue for the appointments. If you have multiple venues including in-person and online venues, ensure you are selecting the correct online venue.
For online appointments, rooms are not required as they are built to prevent space conflicts, and as one user can use Zoom at a time, you will not need this function for online appointments. To learn how to use rooms for your in-person appointments, you can check out our support guide here.
Registration
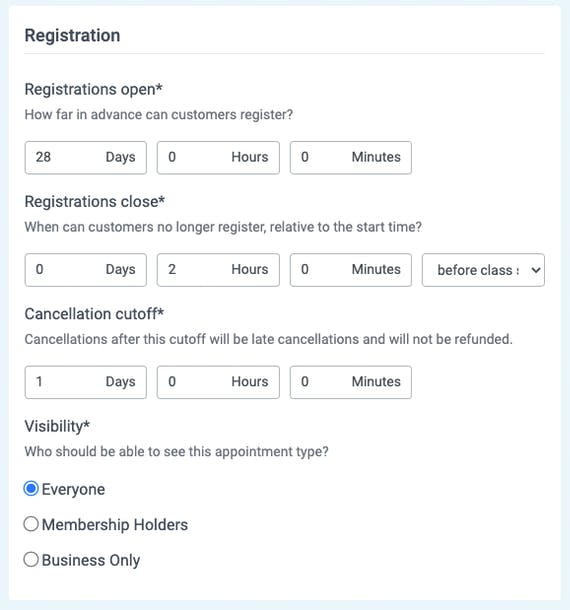
Next, you'll then add in the details regarding the registration and cancellation period as well as who this appointment will be available to - everyone, membership holders, or business only (only staff and trainers can send out links to this appointment and it will not be visible publicly on your customer site). It's up to you who you would like to see the availability for this appointment, and you can change this for every appointment type if there are certain appointments you only want members or staff to see.
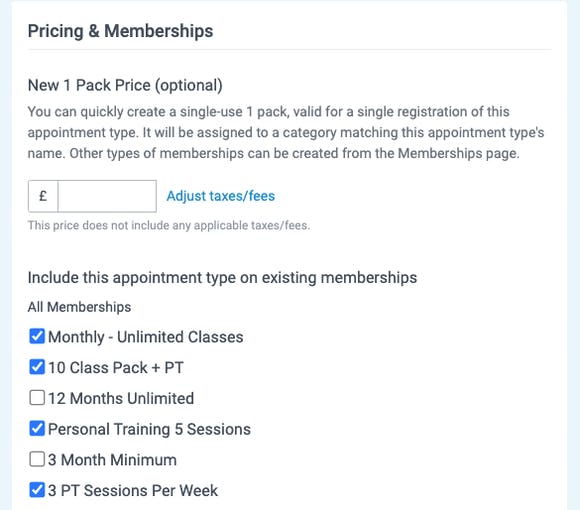
Pricing and memberships
Once you have filled out the registration and visibility, you will either need to create a one-off pack or select a membership to associate with this appointment type. If your clients want to book this appointment type they will either need to have the membership type you select or purchase this pack. If you would like to create a new recurring membership for this appointment, you'll need to do so in the memberships section and return to add it to this appointment type. After you add the plans you can create your appointment type.
Step 4: Let your clients know how they can book your appointments
Once your appointment is created, your clients can officially begin booking via your customer site or their member app. Don't forget to include the announcement of your online appointments in your marketing to your community and encourage your clients to sign up for their appointments using the new tool.
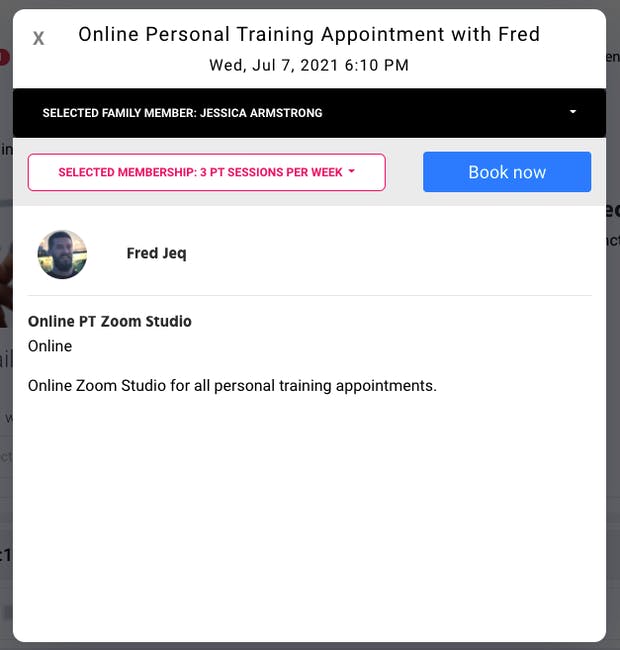
What your customers will see when they book
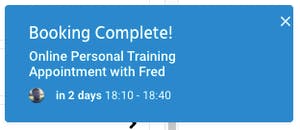
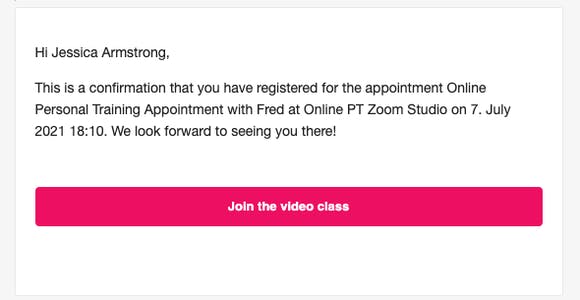
When your customer books an online appointment, once they select the appointment they want to book and with which instructor, they will receive a confirmation notification and an email with the details to open the Zoom meeting before the appointment begins.
They'll also be able to view and schedule your online appointments right from the member app.
To show your clients how to sign up for your online appointments, send them our customers guide to booking appointments.
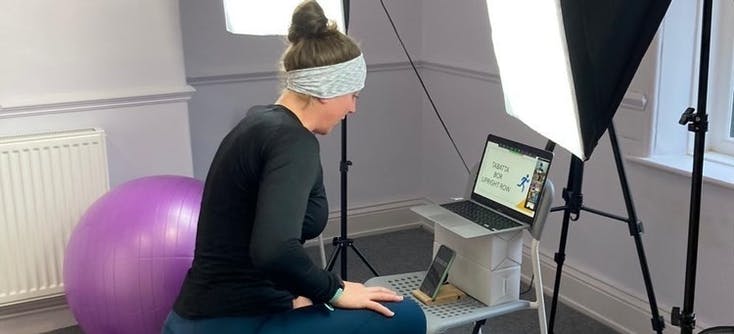
Delivering high-quality online personal training sessions on Zoom
Getting your clients scheduled and registered for appointments is an important step, but giving them the best online training experience doesn't stop there. When hosting your personal training session online there are a few important key factors to keep in mind and steps to take in order to deliver a high-quality PT session online.
Choosing the right space
Whether you're running your appointment from a gym, studio, or your home, your clients don't want to see a cluttered background or mess behind you. Make sure you tidy up, have a clear space where you are visible and clear and the camera is focused on where your clients can see you best.
Get your lighting right
It's also just as important for visibility that you get your lighting right. Having a clear background with the sun reflecting on you without wiping you out will make it easier for clients to follow along without having to run up to the screen to try and see what you're doing. Having a colourful background with lots of pictures and paintings can be distracting and be hard for the client to see you when you're in front of another object.
Get the camera position correct
Finding the perfect position for your camera will set you up for success. Knowing the sweet spot in front of the right space, with great lighting where you know your client will best see you can help you save time for the next session. Use tape or an object on the floor to remind you where to put your camera so next session you're ready to go.
Engage with your clients with multiple cameras and views
Demonstrating the proper positions and movements can be tricky online, but having multiple camera views can help. Using Zooms screen sharing tools you can connect your phone or USB camera to your computer or laptop so that your client can watch you from two or three angles.
Make sure they can hear you clearly
The internet can be fickle and if you include music in your sessions sometimes audio can cut out. If you need to take a moment at the start of a session to make sure your clients can properly hear you it will help you deliver a better session. You can also invest in Bluetooth microphones or headsets if you want to be able to move farther away from your camera or laptop mic.
Don't forget to double-check your connection
As we said, the internet has good days and bad days. Double-check that your connection is strong and that you won't have to spend your session trying to get back into the room because the WiFi or cellular in that area is bad.
Be clear with your instruction and cues
Remember that your clients aren't there with you in person, so being clear and direct with your instruction and cues will go a long way in making sure a client is doing what they are supposed to do the right way.
Use session recordings to get it right
While running private classes online might seem a little awkward or uncomfortable at first that's totally normal. You won't get things 100% perfect the first few times and your client won't fault you for that, but it helps to improve. Recordings will be your best friend and just as you would practise at a skill, practising and watching your recordings will help you learn how to perfect teaching online. This is your livelihood and you want to make sure you are doing everything you can to offer your clients the best.
Check out our full guide for delivering high-quality online classes and appointments on Zoom to learn how to perfect each one of these tips.
To start offering online appointments to your personal training clients, sign in to your TeamUp dashboard or sign up for a free trial.
Thanks for reading!